Friday, September 9, 2011

Rebuilding Legs on a Sofa


wobbly leg
This sofa arrived with three wobbly legs. Not sure what to anticipate, I told my client  it's like "pulling a thread". I'd have to open up the bottom to see what's actually going on. Word to the wise: Beware of light weight sofas!

(what's inside?)
This sofa is made of factory stretched leather, so I wasn't keen on removing any of it unless I had to. I unscrewed the leg, then carefully pulled the dust covers back (2 layers) by removing the staples with a small head screw driver.

Yikes! The inside.
And then I saw it:  Pressed wood and pine, all stapled together.  A couple of bolts, no screws, and that's it! I was surprised that the legs were still attached.  All the bases for the legs had split.  One even had screws drilled in it to fix a split at the factory.

split leg
I would have to custom cut each piece to fit the sofa frame. The biggest difficulty, and a design flaw of this sofa, is that the bottom of each arm actually bowed outward at an angle to create the line of the arm. This meant that the piece of wood that anchored the leg NEVER sat flush against the base. And on one side, it was only supported by the edge of the wood that held the leg, and a wood wedge. AMAZING!

not much support here!
By trial and error, I came up with a plan. After drilling the center hole and placing the screw fitting that encased the leg into place,  I attached metal braces, one on each side of the leg fitting. I made sure these screws were positioned so that they gave me the most room above and below the piece of wood.

I then pre-drilled a hole through the sofa frame and the piece of wood holding the leg. I drilled though the frame far enough to make a mark on the wood with the leg fitting on it, then I took it out, put it in a vise, and drilled through the length of the piece.

 After that, I put the piece back into place, used a 6" bolt screw (with a washer) and carefully drilled it through and into the other side of  the sofa arm. Now, the piece of wood holding the leg is not only stronger, but it is locked into place with glue, 2 bolts that go all the way through it, and anchored by metal braces.


This should now support heavy people, kids, and the occasional elephant.

locked and anchored into place


So.... again:  Since you almost never get a chance to see what's "under the hood" when buying a sofa - remember the weight. Good wood is heavy.   Pine and particle board is light.

You absolutely get what you pay for.


Wednesday, September 7, 2011

Late 1700's Dresser Gets an Overhaul


This piece was bought back East and damaged when it was shipped out
to Los Angeles.


It's an antique dating back to the late 1700's, made
out of pine, has a veneer top to it, and the finishing coat on it is
shellac. There were several scars on the top from previous wear.

Pine is a light, porous wood, and tends to "breath" when it goes
through humidity changes. Enough direct sun light, and the wood will
perspire. This moisture will actually work its way up through the
wood and then up through the shellac, creating small bubbles.


I repaired the piece first, re-gluing the broken legs, then, with the
one leg that had a missing section, I simply stained it to match the
rest of the leg. Because the stain is dark, the missing piece is not
even noticeable.


I replaced the back entirely with a new piece of
1/8" plywood. The top had some veneer pieces that had chipped off.
I glued those down, into place. There were a few missing pieces that
need to be replaced, but matching today's veneer with that of two
hundred year old veneer can be frustrating, if not impossible, so
like the missing leg piece, I opted to stain it to match.

Not one tool touched this piece when it came to removing the
shellac. Shellac removal is a long laborsome process, using a
solution of alcohol mixed with lacquer remover, and then rubbing out
the finish with a lot of elbow grease.

Once I got all the shellac off, I gave the dresser two coats of
stain. The sides were easy. They got a Mahogany Stain to match,
followed by a coat of Amber Shellac.

As for the top, the trim is American Walnut, and the center is
Golden Pecan.

I wanted to use the Amber Shellac on the top.
It would have given it a rich look, along with removing some of the
flaws and scars, but because the piece was going to get some direct
sunlight on it during the day, instead I went with Marine Varnish.
Not something I would normally use, but given its new location, I
thought this would be the least problematic. Each coat (3) was
sanded down with 400 grit sand paper. For the final coats (2), I
thinned the finish down with Mineral Oil by half, using 1200 grit sand
paper.

The owner wanted the pulls left alone.


And there you have it... a pine dresser from the late 1700's restored
and sitting in a Century City high rise.

Friday, November 19, 2010

Major Makeover

Check out the dramatic difference between these "before" and "after" photos on this 1920's bedroom dresses. Years of damage had taken its toll, as evidenced by the water stains, dings, and glue (the owner had glued some sort of piece on top of the dresser). After some major stripping and sanding, this dresser now has a new face.

Before repair:


After repair:


Monday, August 9, 2010

Refinished Chairs


This beautiful set of dining room chairs were in sore need of repair and refinishing. When I started taking the varnish layer off, you could see the dents and divets in the legs. In the back of the chairs, there were glued seams which had started to actually separate.

With TLC and a whole lot of patience, I was able to solidly glue everything back together (so there's no creaking), and I used “gunstock” stain, topped with a gloss finish. These chairs cleaned up nicely!

Friday, April 30, 2010

How I Clean Brass


Polishing brass is never easy. There are always nooks and crannies that are hard to get to, and as much as I like Brasso, it always seems to get stuck in these places and it’s hard to clean out.

Bottom line, when it comes to cleaning metal, it’s all chemistry. For brass, I use a pot of water, 1 cup of white vinegar, and a teaspoon of salt. Throw your brass into the pot and set it on boil. Once it starts boiling, turn down the heat just a little and that’s it. It takes a few hours, so the water, as well as the vinegar and salt, are going to need replacing. You’ll need to keep an eye on things. But in the end, you’ll see a remarkable difference.

Let everything dry over night. Some of the tarnish will come back, but that’s where the Brasso comes in. Use it for the final polishing.

Once you’ve finished with the Brasso, that last step (if you are not going to eat off the item) is to use spray lacquer to coat it. This will help keep it shine and prevent it from tarnishing again.

The only drawback is that your house will smell like vinegar for a short time, and you’ll need to find a dedicated pot for this process. Just don’t throw it away. You’ll use it again, and again, and again.

Monday, March 1, 2010

Rebuilding a piece with multiple types of wood


This piece was a real project. In one of its past lives it had been painted completely white. Later, when it was stripped and stained, because the majority of the wood had deep grain lines in it, and the white paint was lodged so deep in these lines, that instead of taking the trouble to remove all the paint, the option was to use dark stains to cover up what paint was left.


I usually start by turning a piece upside down. That way, I can see what the underbelly of "the beast" really looks like. In this case, it seems it had been rebuilt at least once, if not more. The back was plywood and the pieces inside the seating part were veneer.

Back of the desk before

The trick to getting the left-over paint out was patience and a lot of sanding. I started with a mouse sander and 120 sandpaper, then worked my way through the 180, 220, 320, all by hand. The top was rough and it took some time to get a smooth finish down.

Back of the desk after

As I stripped and sanded, I saw different colored woods emerge, and I wanted to bring these colors out. I used Colonial Maple and Natural stains for the bulk of the piece, and I used a Red Mahogany and Dark Walnut as accent stains. Patience applied here as well.


Two coats of poly, some Brasso for the pulls, and the piece cleaned up nicely.


The desk after multiple rounds of sanding


Drawers after


Top view of drawers after staining and sanding

Tuesday, February 16, 2010

Rehab'd chest of drawers: from start to finish


Take a look at this dresser when it was brought to me...

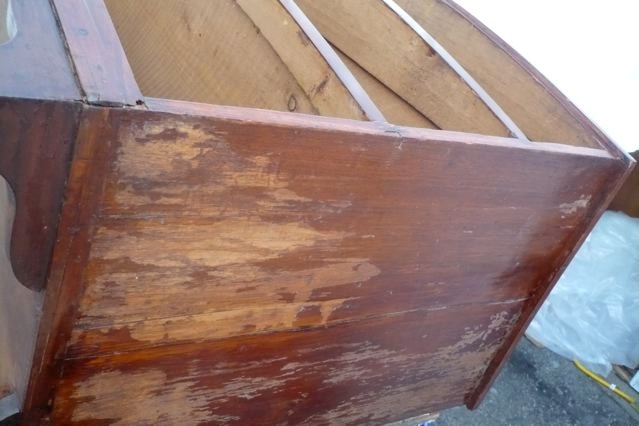
There were water stains...

Extreme discoloration on one end...

...and general wear and tear that hid the natural beauty of the grainline. The drawer pulls were beautiful but tarnished and worn.

I started by sanding down the entire piece, and then I worked on removing those water stains:


Here is the back, mid-way through sanding...

Here is the side in the middle of repair...

And here is the final dresser, after multiple rounds of sanding and staining.

Look at how beautiful these pulls turned out. They were removed and soaked in a boiling vinegar combination and then buffed out by hand.

Top of dresser - finished

Side view, after staining and sanding...

The tongue-in-groove construction of these drawers gave me the idea to play up the tongue, continuing the stain around each drawer. This small detail adds to the uniqueness of the piece.

I was thrilled to deliver this beautiful piece to its grateful owner.